About Me
Tutorial TOU
To view any tag larger/full size, click the image :)
You may not copy/paste my tutorials or text/ideas for tuts ANYWHERE!!! I will find out and report you.
You may text link my posts to various groups etc for challenges
If you wish to translate my tutorials, please email me at kacimcvay(at)yahoo.com
My tutorials are from my own ideas. Any resemblance to another tutorial elsewhere is purely coincidental.
Thanks for looking! Any questions, please email me at the above and I will get back to you asap.
*these are subject to change as I can get into aimoo or think of anything new*
Blog Archive
Powered by Blogger.
Thursday, December 30, 2010
It's A New Year
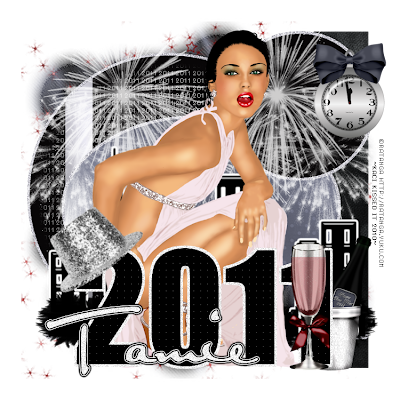
This tutorial was written by Kaci December 30, 2010. Any resemblance to any other tutorials is purely coincidental! You may not copy/paste any part of my tuts elsewhere, but you may text link to them for challenges etc!
Supplies Needed:
newyearTemp1 by Tamie, you can find it HERE
Tube or image of choice, I am using the fantastic artwork of Ratanga, you can find them HERE
Scrapkit of choice, I am using a great kit by Tamie called New Year, you can find it HERE
Fonts I used for 2010 texts-Impact and OhLaLa for the pixel
Plugins Muras Meister Copies
Mask of choice
Let's Begin!
Open your template
Hit shift d and close the original
Delete ©, 2010, 2010 glitter, small text mask, group raster 2, and background layers
With your Impact font, type out 2011 and place where 2010 was
Add a new layer below your 2011
Select all float and defloat on your text
Modify and expand by 5 on your new layer
Floodfill with white and add noise of choice
Select none
With your pixel font type 2011 again
Center and convert to raster
Using mura's meister use my settings below
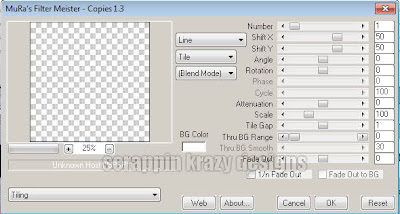
Change your feather to 8
With your magic wand select circle
Invert your selection
Select your pixel text layer and hit delete
Select none
Change the opacity to your liking
Add a new raster layer and send to the bottom
Select all and paste paper4 into your selection
Select none
Apply mask of choice
Merge group
Select rectangle
Select all, float, and defloat
Paste paper1 as a new layer
Invert your selection and hit delete
Select none
Delete rectangle
Select oval
Select all, float, and defloat
Paste paper2 as a new layer
Invert your selection and hit delete
Select none
Delete oval
Add your tube of choice
Resize and position as desired
Add any elements you like
Resize and position
Add any dropshadows you like
Crop and resize as desired
Add your name and copyright
Resize as desired
Save!
Thanks for trying my tut!

Wednesday, December 29, 2010
Raise Your Glass to 2011

This tutorial was written by Kaci December 29, 2010. Any resemblance to any other tutorials is purely coincidental! You may not copy/paste any part of my tuts elsewhere, but you may text link to them for challenges etc!
Supplies Needed:
Temp40 by TallChic, you can find it HERE
Tube or image of choice, I am using the fantastic artwork of Ismael Rac, you can find his work HERE
Scrapkit of choice, I am using a great kit by Tamie called Celebrate, you can find it HERE
Let's Begin!
Open your template
Hit shift d and close the original
Delete raster 7, 5, 6, and background layers
Colorize raster 1 and 3 to match
Select circle1
Select all, float, and defloat
Paste paper11 as a new layer
Invert your selection and hit delete
Select none
Delete circle1
Select circle2
Select all, float, and defloat
Paste paper6 as a new layer
Invert your selection and hit delete
Select none
Delete circle2
Select frame back
Select all, float, and defloat
Paste paper4 as a new layer
Invert your selection and hit delete
Select none
Delete frame back
Add your tube of choice
Resize and position as desired
Add any elements you like
Resize and position
Add any dropshadows you like
Crop and resize as desired
Add your name and copyright
Resize as desired
Save!
Thanks for trying my tut!

Misfit New Year

This tutorial was written by Kaci December 29, 2010. Any resemblance to any other tutorials is purely coincidental! You may not copy/paste any part of my tuts elsewhere, but you may text link to them for challenges etc!
Supplies Needed:
Temp60 by Sapphy, you can find it HERE
Tube or image of choice, I am using the fantastic artwork of Ismael Rac, you can find his work HERE
Scrapkit of choice, I am using a great kit by Tamie called 2011, you can find it HERE
Plugin: Eye Candy Gradient Glow
Let's Begin!
Open your template
Hit shift d and close the original
Delete © and background layers
Colorize frame backgrounds, wordart, and pixel words to match
Select black rectangles
Select all, float, and defloat
Paste paper7 as a new layer
Invert your selection and hit delete
Select none
Delete black rectangles
Select red circle
Select all, float, and defloat
Paste paper8 as a new layer
Invert your selection and hit delete
Select none
Delete red circle
Select black circle
Select all, float, and defloat
Paste paper5 as a new layer
Invert your selection and hit delete
Select none
Delete black circle
Add your tube of choice
Resize and position as desired
On your misfits party girl layer add a gradient glow of choice
Add any elements you like
Resize and position
Add any dropshadows you like
Crop and resize as desired
Add your name and copyright
Resize as desired
Save!
Thanks for trying my tut!

Tuesday, December 28, 2010
You Have My Heart
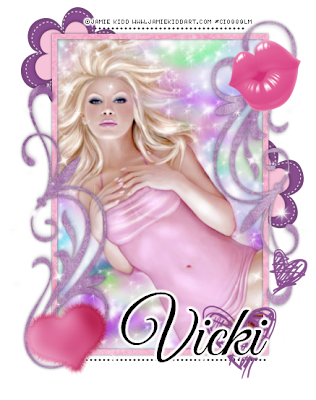
This tutorial was written by Kaci December 28, 2010. Any resemblance to any other tutorials is purely coincidental! You may not copy/paste any part of my tuts elsewhere, but you may text link to them for challenges etc!
Supplies Needed:
Temp30 by Missy, you can find it HERE
Tube or image of choice, I am using the fantastic artwork of Jamie Kidd, you can find her work HERE
Scrapkit of choice, I am using a great kit by Vicki called Milena, you can find it HERE
Let's Begin!
Open your template
Hit shift d and close the original
Delete by missy and background layers
Rotate all layers to the right 90 degrees
Select frame background
Select all, float, and defloat
Paste your image as a new layer
Invert your selection and hit delete
Select none
Delete frame background
Select frame
Select all, float, and defloat
Paste paper2 as a new layer
Invert your selection and hit delete
Select none
Delete frame
Select brush
Select all, float, and defloat
Paste paper10 as a new layer
Invert your selection and hit delete
Select none
Delete brush
Add any elements you like
Resize and position
Add any dropshadows you like
Crop and resize as desired
Add your name and copyright
Resize as desired
Save!
Thanks for trying my tut!

Monday, December 20, 2010
Angelic Innocence
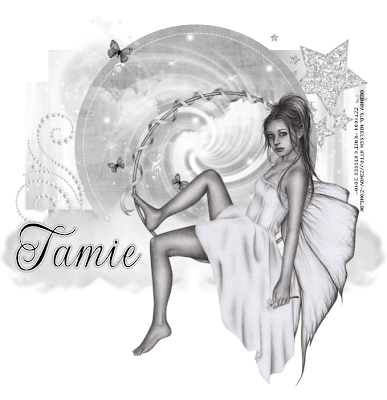
This tutorial was written by Kaci December 20, 2010. Any resemblance to any other tutorials is purely coincidental! You may not copy/paste any part of my tuts elsewhere, but you may text link to them for challenges etc!
Supplies Needed:
Temp148 by Kristin, you can find it HERE
Tube or image of choice, I am using the fantastic artwork of Zindy, you can find her work HERE
Scrapkit of choice, I am using a great kit by Tamie called My Angel, you can find it HERE
Let's Begin!
Open your template
Hit shift d and close the original
Delete credits, both stars, and background layers
Select rectangle1
Select all, float, and defloat
Paste paper7 as a new layer
Invert your selection and hit delete
Select none
Delete rectangle1
Select rectangle2
Select all, float, and defloat
Paste paper6 as a new layer
Invert your selection and hit delete
Select none
Delete rectangle2
Select circle
Select all, float, and defloat
Paste paper10 as a new layer
Invert your selection and hit delete
Select none
Delete circle
Add your tube of choice
Resize and position
Add any elements you like
Resize and position
Add any dropshadows you like
Crop and resize as desired
Add your name and copyright
Resize as desired
Save!
Thanks for trying my tut!

Thursday, December 16, 2010
Aussie Christmas
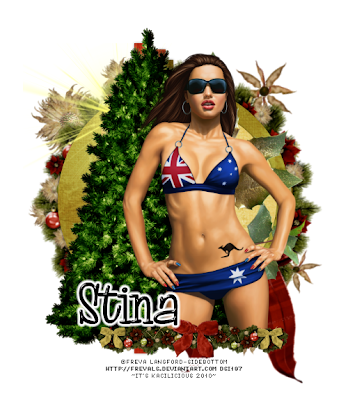
This tutorial was written by Kaci December 16, 2010. Any resemblance to any other tutorials is purely coincidental! You may not copy/paste any part of my tuts elsewhere, but you may text link to them for challenges etc!
Supplies Needed:
Temp78 by Missy, you can find it HERE
Tube or image of choice, I am using the fantastic artwork of Freya Langford-Sidebottom, you can find her work HERE
Scrapkit of choice, I am using a great kit by Stina called Sunburnt Christmas, you can find it HERE
Let's Begin!
Open your template
Hit shift d and close the original
Delete by missy and background
Select circle
Select all, float, and defloat
Paste paper10 as a new layer
Invert your selection and hit delete
Select none
Delete circle
Select small circle
Select all, float, and defloat
Paste paper18 as a new layer
Invert your selection and hit delete
Select none
Delete small circle
Select thin rectangle1
Select all, float, and defloat
Paste paper14 as a new layer
Invert your selection and hit delete
Select none
Delete thin rectangle1
Select thin rectangle2
Select all, float, and defloat
Paste paper16 as a new layer
Invert your selection and hit delete
Select none
Delete thin rectangle2
Select thin rectangle3
Select all, float, and defloat
Paste paper1 as a new layer
Invert your selection and hit delete
Select none
Delete thin rectangle3
Select frame background
Select all, float, and defloat
Paste paper6 as a new layer
Invert your selection and hit delete
Select none
Delete frame background
Select frame
Select all, float, and defloat
Paste paper8 as a new layer
Invert your selection and hit delete
Select none
Delete frame
Add your tube of choice
Resize and position
Add any elements you like
Resize and position
Add any dropshadows you like
Crop and resize as desired
Add your name and copyright
Resize as desired
Save!
Thanks for trying my tut!

Vicki Had A Little Lamb
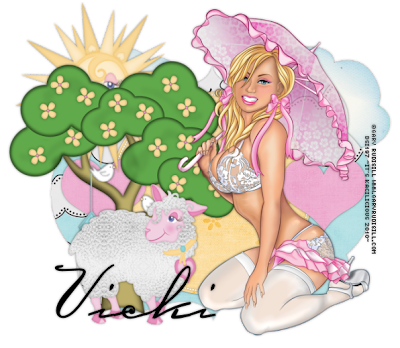
This tutorial was written by Kaci December 16, 2010. Any resemblance to any other tutorials is purely coincidental! You may not copy/paste any part of my tuts elsewhere, but you may text link to them for challenges etc!
Supplies Needed:
Temp102 by Missy, you can find it HERE
Tube or image of choice, I am using the fantastic artwork of Gary Rudisill, you can find his work HERE
Scrapkit of choice, I am using a great kit by Vicki called Lil Bo Peep, you can find it HERE
Let's Begin!
Open your template
Hit shift d and close the original
Delete by watermark and background
Select circle
Select all, float, and defloat
Paste paper7 as a new layer
Invert your selection and hit delete
Select none
Delete circle
Select shape
Select all, float, and defloat
Paste paper11 as a new layer
Invert your selection and hit delete
Select none
Delete shape
Select hearts
Select all, float, and defloat
Paste paper4 as a new layer
Invert your selection and hit delete
Select none
Delete hearts
Add your tube of choice
Resize and position
Add any elements you like
Resize and position
Add any dropshadows you like
Crop and resize as desired
Add your name and copyright
Resize as desired
Save!
Thanks for trying my tut!

Gorjuss Winter
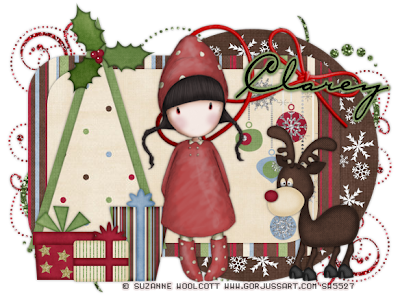
This tutorial was written by Kaci December 16, 2010. Any resemblance to any other tutorials is purely coincidental! You may not copy/paste any part of my tuts elsewhere, but you may text link to them for challenges etc!
Supplies Needed:
Temp74 by Missy, you can find it HERE
Tube or image of choice, I am using the fantastic artwork of Susan Woolcott, you can find her work HERE
Scrapkit of choice, I am using a great kit by Clarey called Christmas Magic, you can find it HERE
Let's Begin!
Open your template
Hit shift d and close the original
Delete by watermark and background
Select circle
Select all, float, and defloat
Paste paper5 as a new layer
Invert your selection and hit delete
Select none
Delete circle
Select rectangle1
Select all, float, and defloat
Paste paper11 as a new layer
Invert your selection and hit delete
Select none
Delete rectangle1
Select rectangle2
Select all, float, and defloat
Paste paper7 as a new layer
Invert your selection and hit delete
Select none
Delete rectangle2
Select base
Select all, float, and defloat
Paste paper5 as a new layer
Invert your selection and hit delete
Select none
Delete base
Select tree1
Select all, float, and defloat
Paste paper2 as a new layer
Invert your selection and hit delete
Select none
Delete tree1
Select tree2
Select all, float, and defloat
Paste paper12 as a new layer
Invert your selection and hit delete
Select none
Delete tree2
Add noise of choice to raster 9
Add your tube of choice
Resize and position
Add any elements you like
Resize and position
Add any dropshadows you like
Crop and resize as desired
Add your name and copyright
Resize as desired
Save!
Thanks for trying my tut!

Monday, December 13, 2010
Christmas Kitty
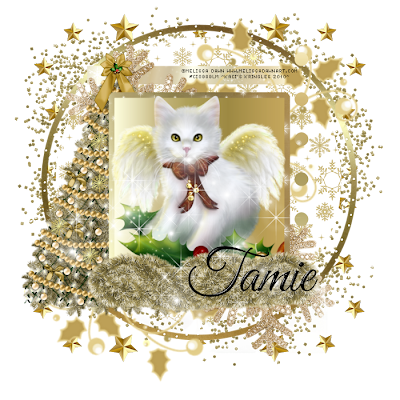
This tutorial was written by Kaci December 13, 2010. Any resemblance to any other tutorials is purely coincidental! You may not copy/paste any part of my tuts elsewhere, but you may text link to them for challenges etc!
Supplies Needed:
Christmastemp2 by Melissa, you can find it HERE
Tube or image of choice, I am using the fantastic artwork of Melissa Dawn, you can find her work HERE
Scrapkit of choice, I am using a great kit by Tamie called Golden Christmas, you can find it HERE
Let's Begin!
Open your template
Hit shift d and close the original
Delete raster 1, raster 2, and copy of raster 2
Select raster 8
Select all, float, and defloat
Paste paper10 as a new layer
Invert your selection and hit delete
Select none
Delete raster 8
Select raster 7
Select all, float, and defloat
Paste paper6 as a new layer
Invert your selection and hit delete
Select none
Delete raster 7
Select raster 3
Select all, float, and defloat
Paste paper4 as a new layer
Invert your selection and hit delete
Select none
Delete raster 3
Select raster 5
Select all, float, and defloat
Paste paper2 as a new layer
Invert your selection and hit delete
Select none
Delete raster 5
Repeat for copy of raster 5
Select raster 6
Select all, float, and defloat
Paste paper1 as a new layer
Invert your selection and hit delete
Select none
Delete raster 6
Repeat for copy of raster 6
Select raster 4
Select all, float, and defloat
Paste paper8 as a new layer
Invert your selection and hit delete
Select none
Delete raster 4
Add your tube of choice
Resize and position
Add any elements you like
Resize and position
Add any dropshadows you like
Crop and resize as desired
Add your name and copyright
Resize as desired
Save!
Thanks for trying my tut!

Sunday, December 12, 2010
Cute Christmas
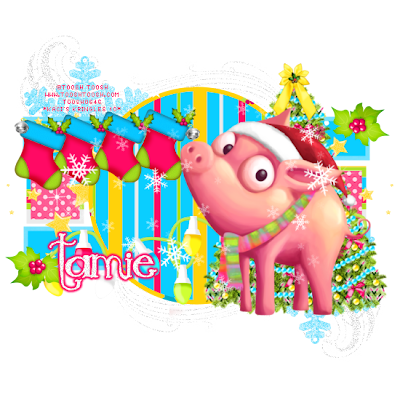
This tutorial was written by Kaci December 12, 2010. Any resemblance to any other tutorials is purely coincidental! You may not copy/paste any part of my tuts elsewhere, but you may text link to them for challenges etc!
Supplies Needed:
Template43 by Melissa, you can find it HERE
Tube or image of choice, I am using the fantastic artwork of Toosh Toosh, you can find her work HERE
Scrapkit of choice, I am using a great kit by Tamie called Half Past Christmas, you can find it HERE
Let's Begin!
Open your template
Hit shift d and close the original
Delete melissaz creationz and background
Colorize swirls and glitter trails to white
Select squares
Select all, float, and defloat
Paste paper12 as a new layer
Invert your selection and hit delete
Select none
Delete squares
Select square frames
Select all, float, and defloat
Paste paper4 as a new layer
Invert your selection and hit delete
Select none
Delete square frames
Select rectangles
Select all, float, and defloat
Paste paper1 as a new layer
Invert your selection and hit delete
Select none
Delete rectangles
Select rectangle frames
Select all, float, and defloat
Paste paper6 as a new layer
Invert your selection and hit delete
Select none
Delete rectangle frames
Select circle
Select all, float, and defloat
Paste paper3 as a new layer
Invert your selection and hit delete
Select none
Delete circle
Select circle frame
Select all, float, and defloat
Paste paper2 as a new layer
Invert your selection and hit delete
Select none
Delete circle frame
Add your tube of choice
Resize and position
Add any elements you like
Resize and position
Add any dropshadows you like
Crop and resize as desired
Add your name and copyright
Resize as desired
Save!
Thanks for trying my tut!

Snow Bunny
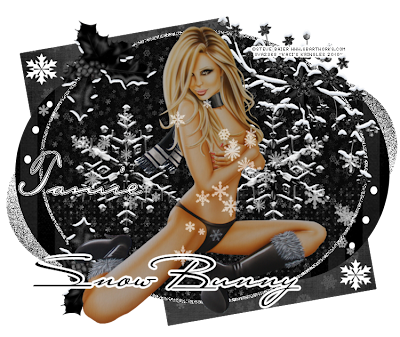
This tutorial was written by Kaci December 12, 2010. Any resemblance to any other tutorials is purely coincidental! You may not copy/paste any part of my tuts elsewhere, but you may text link to them for challenges etc!
Supplies Needed:
ccssnowbunny temp by Cakes, you can find it HERE
Tube or image of choice, I am using the fantastic artwork of Steve Baier, you can find his work HERE
Scrapkit of choice, I am using a great kit by Tamie called Black Christmas, you can find it HERE
Plugin Eye Candy Gradient Glow
Let's Begin!
Open your template
Hit shift d and close the original
Delete ©
Colorize 1, 3, 4, 6, 10, and 11
Select 13
Select all, float, and defloat
Paste paper10 as a new layer
Invert your selection and hit delete
Select none
Delete 13
Repeat for 12
Select 9
Select all, float, and defloat
Paste paper5 as a new layer
Invert your selection and hit delete
Select none
Delete 9
Repeat for 8
Select 7
Select all, float, and defloat
Paste paper3 as a new layer
Invert your selection and hit delete
Select none
Delete 7
Add a gradient glow of choice to 1
Add your tube of choice
Resize and position
Add any elements you like
Resize and position
Add any dropshadows you like
Crop and resize as desired
Add your name and copyright
Resize as desired
Save!
Thanks for trying my tut!

Sunday, November 14, 2010
If The Shoe Fits
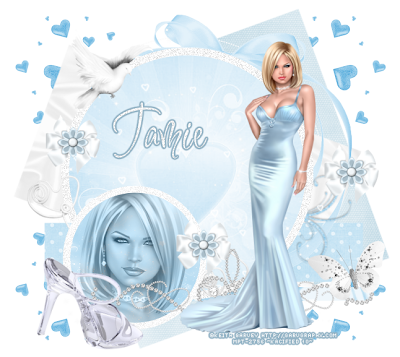
This tutorial was written by Kaci November 14, 2010. Any resemblance to any other tutorials is purely coincidental! You may not copy/paste any part of my tuts elsewhere, but you may text link to them for challenges etc!
Supplies Needed:
Temp90 by Rosey, you can find it HERE
Tube or image of choice, I am using the fantastic artwork of Keith Garvey, you can find his work HERE
Scrapkit of choice, I am using a great kit by Tamie called Cinderella, you can find it HERE
Let's Begin!
Open your template
Hit shift d and close the original
Delete credits, all wordart and raster 1
Select pink square
Select all, float, and defloat
Paste paper1 as a new layer
Invert your selection and hit delete
Select none
Delete pink square
Colorize dotted circle to your liking
Select black rectangle
Select all, float, and defloat
Paste paper8 as a new layer
Invert your selection and hit delete
Select none
Delete black rectangle
Select purple rectangle
Select all, float, and defloat
Paste paper2 as a new layer
Invert your selection and hit delete
Select none
Delete purple rectangle
Select small dark pink rectangle
Select all, float, and defloat
Paste paper3 as a new layer
Invert your selection and hit delete
Select none
Delete small dark pink rectangle
Select pink circle
Select all, float, and defloat
Paste paper11 as a new layer
Invert your selection and hit delete
Select none
Delete pink circle
Colorize small glitter blue circle to your liking
Select grey circle
Select all, float, and defloat
Paste paper6 as a new layer
Invert your selection and hit delete
Select none
Delete grey circle
Add your tube of choice
Resize and position
Add any elements you like
Resize and position
Add any dropshadows you like
Crop and resize as desired
Add your name and copyright
Resize as desired
Save!
Thanks for trying my tut!

Monday, October 4, 2010
Mmmm Cupcakes

This tutorial was written by Kaci October 4, 2010. Any resemblance to any other tutorials is purely coincidental! You may not copy/paste any part of my tuts elsewhere, but you may text link to them for challenges etc!
Supplies Needed:
Temp6 by Salsa, you can find it HERE
Tube or image of choice, I am using the fantastic artwork of Keith Garvey, you can find his work HERE
Scrapkit of choice, I am using a great kit by Clarey called Cupcake Party, you can find it HERE
Let's Begin!
Open your template
Hit shift d and close the original
Delete credits, raster 1, and jealousy
I replaced jealousy with cupcakes but that is up to you!
Colorize mmm I smell... and glittered wordart to match
Select back rectangle
Select all, float, and defloat
Paste paper14 as a new layer
Invert your selection and hit delete
Select none
Delete back rectangle
Select large pink circle
Select all, float, and defloat
Paste paper7 as a new layer
Invert your selection and hit delete
Select none
Delete large pink circle
Select large blk circle
Select all, float, and defloat
Paste paper4 as a new layer
Invert your selection and hit delete
Select none
Delete large blk circle
Select left purple circle
Select all, float, and defloat
Paste paper9 as a new layer
Invert your selection and hit delete
Select none
Delete left purple circle
Repeat for right purple circle
Select left blk square
Select all, float, and defloat
Paste paper10 as a new layer
Invert your selection and hit delete
Select none
Delete left blk square
Repeat for right blk square
Select small pink circle
Select all, float, and defloat
Paste paper1 as a new layer
Invert your selection and hit delete
Select none
Delete small pink circle
Select centre blk rectangle
Select all, float, and defloat
Paste paper11 as a new layer
Invert your selection and hit delete
Select none
Delete centre blk rectangle
Add noise of choice to stars and dotted circle
I used uniform monochrome at 45
Add your tube of choice
Resize and position
Add any elements you like
Resize and position
Add any dropshadows you like
Crop and resize as desired
Add your name and copyright
Resize as desired
Save!
Thanks for trying my tut!

Monday, September 13, 2010
Haterade
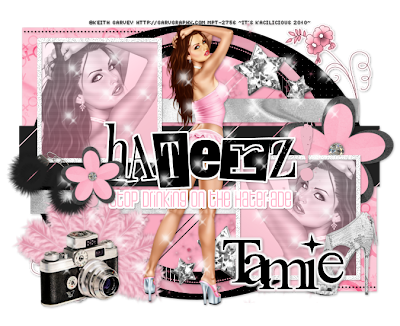
This tutorial was written by Kaci September 13, 2010. Any resemblance to any other tutorials is purely coincidental! You may not copy/paste any part of my tuts elsewhere, but you may text link to them for challenges etc!
Supplies Needed:
Temp376 by Missy, you can find it HERE
Tube or image of choice, I am using the fantastic artwork of Keith Garvey, you can find his work HERE
Scrapkit of choice, I am using a great kit by Designs By Tamie & Vicki called Centerfold, you can find it HERE
Plugins: Penta Color Dot and Tramages Tow the Line
Let's Begin!
Open your template
Hit shift d and close the original
Delete by missy and background layers
Colorize both frame backs, dotted circle, wordart, and exclamation mark to match
Select shape1
Select all, float, and defloat
Paste pp1 as a new layer
Invert your selection and hit delete
Select none
Delete shape1
Repeat for shape2
Select circle1
Select all, float, and defloat
Paste p4 as a new layer
Invert your selection and hit delete
Select none
Delete circle1
Select circle3
Select all, float, and defloat
Paste pp6 as a new layer
Invert your selection and hit delete
Select none
Delete circle3
Select rectangle
Select all, float, and defloat
Paste pp5 as a new layer
Invert your selection and hit delete
Select none
Delete rectangle
Select raster 1
Select all, float, and defloat
Paste p7 as a new layer
Invert your selection and hit delete
Select none
Delete raster 1
Repeat for copy of raster 1
On oval, apply penta color dot, change the distance to 10
On circle2, apply tramages tow the line
Add noise of choice to both frames
Add your tube of choice
Resize and position
Add any elements you like
Resize and position
Add any dropshadows you like
Crop and resize as desired
Add your name and copyright
Resize as desired
Save!
Thanks for trying my tut!

Friday, September 10, 2010
Naughty Nymph
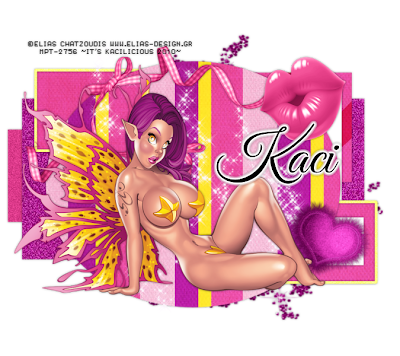
This tutorial was written by Kaci September 10, 2010. Any resemblance to any other tutorials is purely coincidental! You may not copy/paste any part of my tuts elsewhere, but you may text link to them for challenges etc!
Supplies Needed:
nympho temp by Cakes, you can find it HERE
Tube or image of choice, I am using the fantastic artwork of Elias Chatzoudis, you can find his work HERE
Scrapkit of choice, I am using a great kit by me called Naughty Nymph FTU, you can find it HERE
Let's Begin!
Open your template
Hit shift d and close the original
Delete raster 3, blackline, whiteline, both words, and raster 1
Colorize glitterrectangle, gframe, lilrect2, heart, & grame2 to match
Select bigrectangle
Select all, float, and defloat
Paste paper16 as a new layer
Invert your selection and hit delete
Select none
Delete bigrectangle
Select bottom square
Select all, float, and defloat
Paste paper9 as a new layer
Invert your selection and hit delete
Select none
Delete bottom square
Select rectangleleft
Select all, float, and defloat
Paste paper2 as a new layer
Invert your selection and hit delete
Select none
Delete rectangleleft
Repeat for rectangleright
Select oval
Select all, float, and defloat
Paste paper11 as a new layer
Invert your selection and hit delete
Select none
Delete oval
Add your tube of choice
Resize and position
Add any elements you like
Resize and position
Add any dropshadows you like
Crop and resize as desired
Add your name and copyright
Resize as desired
Save!
Thanks for trying my tut!

Subscribe to:
Posts (Atom)
Labels
- ptu kit (394)
- Tasha's Playground (63)
- Designs By Sarah (49)
- Keith Garvey (47)
- Pink Paradox Productions (41)
- Pinup Toons (32)
- CDO (30)
- Elias Chatzoudis (29)
- TammyKat (28)
- VeryMany (26)
- Ismael Rac (25)
- Zindy (22)
- Candy's Treats (18)
- ChiChi Designz (18)
- Kaci McVay (16)
- tag (14)
- toxic desirez (14)
- ftu kit (13)
- Alex Prihodko (12)
- Amy Matthews (10)
- Grunge and Glitter (9)
- Lady Mishka (9)
- Spazz (9)
- celine (9)
- Kikeka Kits (7)
- Rieka Rafita (7)
- Scrappin Krazy Designs (7)
- Anna Marine (6)
- MellieBeans (6)
- Michael Landefeld (6)
- Barbara Jensen (5)
- Caron Vinson (5)
- Celinart (5)
- Clarey's Designs (5)
- Designs by Stina (5)
- Ellie Milk (5)
- Jennifer Janesko (5)
- Jose Cano (5)
- Killer Kitty (5)
- Sarah's Tags n Things (5)
- Zlata_M (5)
- Freya Langford-Sidebottom (4)
- Gary Rudisill (4)
- Gorjuss (4)
- Graphfreaks (4)
- Jessica Dougherty (4)
- Kiwifire Storm (4)
- LadyHawwk Designs (4)
- Misticheskaya (4)
- Robert Alvarado (4)
- Zebrush (4)
- Abstract Creations (3)
- Alehandra Vanhek (3)
- Arthur Crowe (3)
- Creative Intentionz (3)
- Enamorte (3)
- Eugene Rzhevskii (3)
- FourXDesigns (3)
- Rebel Dezigns (3)
- Roman Zaric (3)
- Shining Star Art (3)
- Simon Han (3)
- TootyPup Scraps (3)
- ftu tube (3)
- Alfadesire (2)
- BabyCakes (2)
- Charles Bristow (2)
- Chris Pastel (2)
- Creative Tubes By Crys (2)
- Danny Lee (2)
- Gemini Creationz (2)
- Honored Scraps (2)
- Irene Shpak (2)
- Joel Adams (2)
- Josh Howard (2)
- Martin Abel (2)
- Rabid Designz (2)
- Robert Freeman (2)
- Scott Blair (2)
- Tony Tzanoukakis (2)
- Trinita (2)
- cluster frame (2)
- no scraps (2)
- note (2)
- Anna Liwanag (1)
- Armanda Huerta (1)
- Camilla Drakenborg (1)
- Camilla Drakenbork (1)
- Creative Scraps by Crys (1)
- Cris DeLara (1)
- Cute Loot (1)
- Deacon Black (1)
- Dean Yeagle (1)
- DigiScrap Dayz (1)
- Dirk Richter (1)
- Ditzy Dezigns (1)
- Elizabeth Austin (1)
- Emerald De Leeuw (1)
- Enys Guerrero (1)
- Foxy's Designz (1)
- Fred Winkler (1)
- Gimptastic Scraps (1)
- Inzpired Creationz (1)
- Irish Bitch Designs (1)
- Ishika Chowdhury (1)
- Jamie Kidd (1)
- Kenny K (1)
- Kizzed By Kelz (1)
- Kreative Graphics (1)
- Kurama Phoenix (1)
- Marc Duval (1)
- Maryline Cazenave (1)
- Melissa Dawn (1)
- Michael Calandra (1)
- Monti (1)
- MoshiLove (1)
- Myka Jelina (1)
- Pimp'd Designz (1)
- Rainbow Parrot Scraps (1)
- Ratanga (1)
- Robin McQuay (1)
- Schnegge (1)
- Stef (1)
- Steve Baier (1)
- TLP Designz (1)
- Tatjana Art (1)
- Tiny Turtle Designs (1)
- TooshToosh (1)
- Tunchy (1)
- WD Designz (1)
- Wendy Gerber (1)
- Wicked Princess (1)
- scraps only (1)


