


Showing posts with label Grunge and Glitter. Show all posts
Showing posts with label Grunge and Glitter. Show all posts
Sunday, August 7, 2011
Girls Night Out
 10:39 AM |
  Posted by
Kaci
Posted by
Kaci
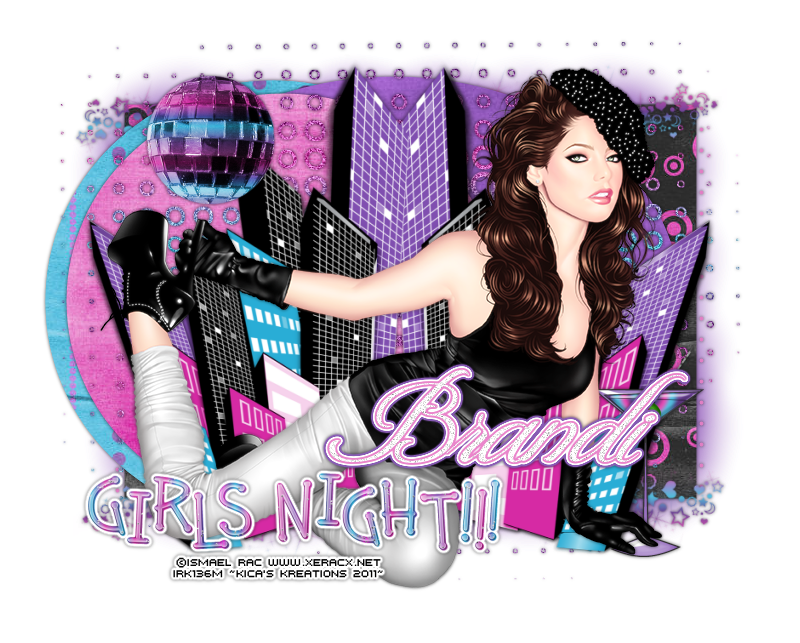
This tutorial was written by Kaci on August 7, 2011. Any resemblance to any other tutorials is purely coincidental! You may not copy/paste any part of my tuts elsewhere, but you may text link to them for challenges etc!
Supplies Needed:
ikissed Temp by Cakes, you can find it HERE
Tube or image of choice, I am using the fantastic artwork of Ismael Rac, you can find these tubes HERE
Scrapkit of choice, I am using a great kit by Grunge N Glitter called Girls Night Out, you can find it HERE Her blog HERE
Let's Begin!
Open your template
Hit shift d and close the original
Delete words, backword, raster 4, ©, and pixel words all
Colorize bottom and middle merged to match your kit
Select raster 3
Select all, float, and defloat
Paste paper4 as a new layer
Invert your selection and hit delete
Select none
Delete raster 3
Select raster 2
Select all, float, and defloat
Paste paper5 as a new layer
Invert your selection and hit delete
Select none
Delete raster 2
Select top merged
Select all, float, and defloat
Paste paper16 as a new layer
Invert your selection and hit delete
Select none
Delete top merged
Select raster 1
Select all, float, and defloat
Paste paper14 as a new layer
Invert your selection and hit delete
Select none
Delete raster 1
Add any elements you like
Resize and position
Add any dropshadows you like
Crop and resize as desired
Add your name and copyright
Resize as desired
Save!
Thanks for trying my tut!

 Labels:

Saturday, May 28, 2011
Music Is Life

This tutorial was written by Kaci on May 28, 2011. Any resemblance to any other tutorials is purely coincidental! You may not copy/paste any part of my tuts elsewhere, but you may text link to them for challenges etc!
Supplies Needed:
Temp403 by Missy, you can find it HERE
Tube or image of choice, I am using the fantastic artwork of Keith Garvey, you can find these tubes HERE
Scrapkit of choice, I am using a great kit by Toxic Desirez n Grunge and Glitter called Music Is My Life, you can find it HERE
Plugin: Penta Color Dot
Let's Begin!

Open your template
Hit shift d and close the original
Delete background, and by missy
Go to Image Canvas Size and change to 675x675
Select copy of circle3
Select all, float, and defloat
Paste GNG paper as a new layer
Invert your selection and hit delete
Select none
Delete copy of circle3
Select square
Select all, float, and defloat
Paste GNG paper12 as a new layer
Invert your selection and hit delete
Select none
Delete square
Repeat for both stars, circle1, and thin rect3
Select rectangle1
Select all, float, and defloat
Paste Kristin's paper26 as a new layer
Invert your selection and hit delete
Select none
Delete rectangle1
Select rectangle2
Select all, float, and defloat
Paste Kristin's paper1 as a new layer
Invert your selection and hit delete
Select none
Delete rectangle2
Repeat for circle3
Select thin rectangle1
Select all, float, and defloat
Paste Kristin's paper27 as a new layer
Invert your selection and hit delete
Select none
Delete thin rectangle1
Select thin rectangle2
Select all, float, and defloat
Paste GNG's paper8 as a new layer
Invert your selection and hit delete
Select none
Delete thin rectangle2
Select frame back
Select all, float, and defloat
Paste GNG's paper14 as a new layer
Invert your selection and hit delete
Select none
Delete frame back
On circle2, add penta color dot change the distance to 10
Add noise of choice to frame
Colorize dotted lines to match
Add your tube of choice
Resize and position as desired
Add any elements you like
Resize and position
Add any dropshadows you like
Crop and resize as desired
Add your name and copyright
Resize as desired
Save!
Thanks for trying my tut!
Friday, May 27, 2011
Love Lady Mishka

This tutorial was written by Kaci on May 27, 2011. Any resemblance to any other tutorials is purely coincidental! You may not copy/paste any part of my tuts elsewhere, but you may text link to them for challenges etc!
Supplies Needed:
Tube or image of choice, I am using one by Lady Mishka, which you can these tubes HERE
Scrap kit of choice, I'm using one by Grunge and Glitter called Mishka Maniac, you can find her kit HERE
Masks of choice
Let's Begin!
Open a new image 675x650 at 72 dpi
Select all and paste paper2 into your selection
Apply mask of choice
Merge group
Add cluster frame 2
Resize by 90%
Take your magic wand tool
Tolerance at 20 and feather at 0
Select the inside of your frame
Expand your selection by 6
Add glitter sheet4 below your frame
Invert your selection and hit delete
Select none
Add your tube of choice
Position to your liking
Duplicate and on the dupe layer add a gaussian blur of 2
Change the blend mode on this layer to soft light
Add a dropshadow of choice to your tube original and frame layers
Add any other embellishments you like
Add your name and any copyright info you need
Save as png!
Thanks for trying my tut
Sunday, May 15, 2011
Twilight

This tutorial was written by Kaci on May 15, 2011. Any resemblance to any other tutorials is purely coincidental! You may not copy/paste any part of my tuts elsewhere, but you may text link to them for challenges etc!
Supplies Needed:
Temp406 by Missy, you can find it HERE
Tube or image of choice, I am using the fantastic artwork of Zlata_M, you can find these tubes HERE
Scrapkit of choice, I am using a great kit by Grunge N Glitter called I Heart Twilight, you can find it HERE
Plugins: Penta Color Dot and Tramages Tow The Line
Let's Begin!
Open your template
Hit shift d and close the original
Delete by missy, stars, and background
Colorize squares left and right to match
Apply penta color dot to rect1 & 2 and change the distance to around 10
Select center rect
Select all, float, and defloat
Paste paper2 as a new layer
Invert your selection and hit delete
Select none
Delete center rect
Select center back
Select all, float, and defloat
Paste paper10 as a new layer
Invert your selection and hit delete
Select none
Delete center back
Add noise of choice to both frames right and left
Apply tramages tow the line on rounded edge rect default settings
Add your tube of choice
Resize and position as desired
Add any elements you like
Resize and position
Add any dropshadows you like
Crop and resize as desired
Add your name and copyright
Resize as desired
Save!
Thanks for trying my tut!
Thursday, May 5, 2011
Be Mine

This tutorial was written by Kaci on May 5, 2011. Any resemblance to any other tutorials is purely coincidental! You may not copy/paste any part of my tuts elsewhere, but you may text link to them for challenges etc!
Supplies Needed:
Temp3 by Vicki, you can find it HERE
Tube or image of choice, I am using the fantastic artwork of Keith Garvey, you can find these tubes HERE
Scrapkit of choice, I am using a great kit by Grunge N Glitter called Be Mine, you can find it HERE
Let's Begin!
Open your template
Hit shift d and close the original
Delete raster 8 & background
Select raster 7
Select all, float, and defloat
Paste paper14 as a new layer
Invert your selection and hit delete
Select none
Delete raster 7
Select raster 6
Select all, float, and defloat
Paste paper12 as a new layer
Invert your selection and hit delete
Select none
Delete raster 6
Select raster 1
Select all, float, and defloat
Paste paper2 as a new layer
Invert your selection and hit delete
Select none
Delete raster 1
Select raster 2
Select all, float, and defloat
Paste paper15 as a new layer
Invert your selection and hit delete
Select none
Delete raster 2
Select raster 3
Select all, float, and defloat
Paste paper10 as a new layer
Invert your selection and hit delete
Select none
Delete raster 3
Select raster 4
Select all, float, and defloat
Paste paper11 as a new layer
Invert your selection and hit delete
Select none
Delete raster 4
Select raster 5
Select all, float, and defloat
Paste paper12 as a new layer
Invert your selection and hit delete
Select none
Delete raster 5
Repeat for copy of raster 5
Add your tube of choice
Resize and position as desired
Add any elements you like
Resize and position
Add any dropshadows you like
Crop and resize as desired
Add your name and copyright
Resize as desired
Save!
Thanks for trying my tut!
Wednesday, April 20, 2011
Sweetest Spring

This tutorial was written by Kaci on April 20, 2011. Any resemblance to any other tutorials is purely coincidental! You may not copy/paste any part of my tuts elsewhere, but you may text link to them for challenges etc!
Supplies Needed:
Temp43 by Missy, you can find it HERE
Tube or image of choice, I am using the fantastic artwork of Ismael Rac, you can find his tubes HERE
Scrapkit of choice, I am using a great kit by Grunge n Glitter called Spring Fever, you can find it HERE
Let's Begin!
Open your template
Hit shift d and close the original
Resize all layers to 585x700
Now go to Image Canvas Size and change to 650x700
Delete copyright info, squares, and background
Select circle1
Select all, float, and defloat
Paste paper5 as a new layer
Invert your selection and hit delete
Select none
Delete circle1
Repeat for circle2
Select large rectangle
Select all, float, and defloat
Paste paper10 as a new layer
Invert your selection and hit delete
Select none
Delete large rectangle
Select small rectangle
Select all, float, and defloat
Paste paper7 as a new layer
Invert your selection and hit delete
Select none
Delete small rectangle
Add a wordart of choice and place as I have
Add your tube of choice
Resize and position as desired
Add any elements you like
Resize and position
Add any dropshadows you like
Crop and resize as desired
Add your name and copyright
Resize as desired
Save!
Thanks for trying my tut!
Imperfect

This tutorial was written by Kaci on April 20, 2011. Any resemblance to any other tutorials is purely coincidental! You may not copy/paste any part of my tuts elsewhere, but you may text link to them for challenges etc!
Supplies Needed:
CollabTemp1 by Cindy n Linda, you can find it HERE
Tube or image of choice, I am using the fantastic artwork of Lady Mishka, this tube is a free gift from her and you can find out more about it HERE
Scrapkit of choice, I am using a great kit by Grunge n Glitter called Emolicious, you can find it HERE
Let's Begin!
Open your template
Hit shift d and close the original
Delete credits and background and star
Colorize pink grained rectangle, dotted lines, shape, and pink grained circle to match
Select black circle
Select all, float, and defloat
Paste paper11 as a new layer
Invert your selection and hit delete
Select none
Delete black circle
Select black rectangle
Select all, float, and defloat
Paste paper18 as a new layer
Invert your selection and hit delete
Select none
Delete black rectangle
Select pinkrectangle
Select all, float, and defloat
Paste paper1 as a new layer
Invert your selection and hit delete
Select none
Delete pinkrectangle
Add your tube of choice
Resize and position as desired
Add any elements you like
Resize and position
Add any dropshadows you like
Crop and resize as desired
Add your name and copyright
Resize as desired
Save!
Thanks for trying my tut!
Tuesday, April 19, 2011
Do I Smell a Hater?

This tutorial was written by Kaci on April 19, 2011. Any resemblance to any other tutorials is purely coincidental! You may not copy/paste any part of my tuts elsewhere, but you may text link to them for challenges etc!
Supplies Needed:
Temp86 by Deb, you can find it HERE
Tube or image of choice, I am using the fantastic artwork of Kenny K, you must have a license to use his work, and you can find them HERE
Scrapkit of choice, I am using a great kit by Grunge n Glitter called Miss Understood, you can find it HERE
Let's Begin!
Open your template
Hit shift d and close the original
Delete raster 7 & 1
Add noise to raster 4 as desired
Select bottom copy of vector 1
Select all, float, and defloat
Paste paper13 as a new layer
Invert your selection and hit delete
Select none
Delete bottom copy of vector 1
Select raster 3
Select all, float, and defloat
Paste paper7 as a new layer
Invert your selection and hit delete
Select none
Delete raster 3
Select raster 5
Select all, float, and defloat
Paste paper15 as a new layer
Invert your selection and hit delete
Select none
Delete raster 5
Merge copy (2) and (3) of vector 1 layers together
Select all, float, and defloat
Paste paper16 as a new layer
Invert your selection and hit delete
Select none
Delete your merged layers
Select raster 6
Select all, float, and defloat
Paste paper12 as a new layer
Invert your selection and hit delete
Select none
Delete raster 6
Add your tube of choice
Resize and position as desired
Add any elements you like
Resize and position
Add any dropshadows you like
Crop and resize as desired
Add your name and copyright
Resize as desired
Save!
Thanks for trying my tut!
Saturday, March 26, 2011
Wistful Beauty

This tutorial was written by Kaci on March 26, 2011. Any resemblance to any other tutorials is purely coincidental! You may not copy/paste any part of my tuts elsewhere, but you may text link to them for challenges etc!
Supplies Needed:
Temp50 by Leah, you can find it HERE
Tube or image of choice, I am using the fantastic artwork of Simon Han, you can find his work HERE
Scrapkit of choice, I am using a great kit by Grunge And Glitter called Moonlight Sonata, you can find it HERE
Let's Begin!
Open your template
Hit shift d and close the original
Delete credits, all wording, and bg
Go to image, canvas size and change to 725x675
Select circle3
Select all, float, and defloat
Paste paper9 as a new layer
Invert your selection and hit delete
Select none
Delete circle3
Select circle2
Select all, float, and defloat
Paste paper4 as a new layer
Invert your selection and hit delete
Select none
Delete circle2
Repeat for circle1
Select square3
Select all, float, and defloat
Paste paper10 as a new layer
Invert your selection and hit delete
Select none
Delete square3
Select frame3
Select all, float, and defloat
Paste paper12 as a new layer
Invert your selection and hit delete
Select none
Delete frame3
Select square2
Select all, float, and defloat
Paste paper2 as a new layer
Invert your selection and hit delete
Select none
Delete square2
Repeat for square1
Select frame2
Select all, float, and defloat
Paste paper3 as a new layer
Invert your selection and hit delete
Select none
Delete frame2
Repeat for frame1
Add your tube of choice
Resize and position as desired
Add any elements you like
Resize and position
Add any dropshadows you like
Crop and resize as desired
Add your name and copyright
Resize as desired
Save!
Thanks for trying my tut!
Subscribe to:
Posts (Atom)